Download Ultorg 2.1.4 
To start using Ultorg, please follow the instructions below. For help, you can contact us.
See the Release Notes for a summary of updates since previous versions.
1. Create Your Ultorg Account
First create an Ultorg account, or log in if you already have one.
(Your free 14-day trial period will not start until you actually activate the product.)
2. Download and Install Ultorg
Installation Instructions for MacOS
- Verify the architecture type for your Mac in the dropdown above. Older Macs have Intel processors, while newer ones use the Apple Silicon (“M”) architecture. Ultorg will show an error message if you attempt to run the wrong version.
- Click the button above to download the Ultorg DMG file.
- Double-click the downloaded file. A folder with icons should open.
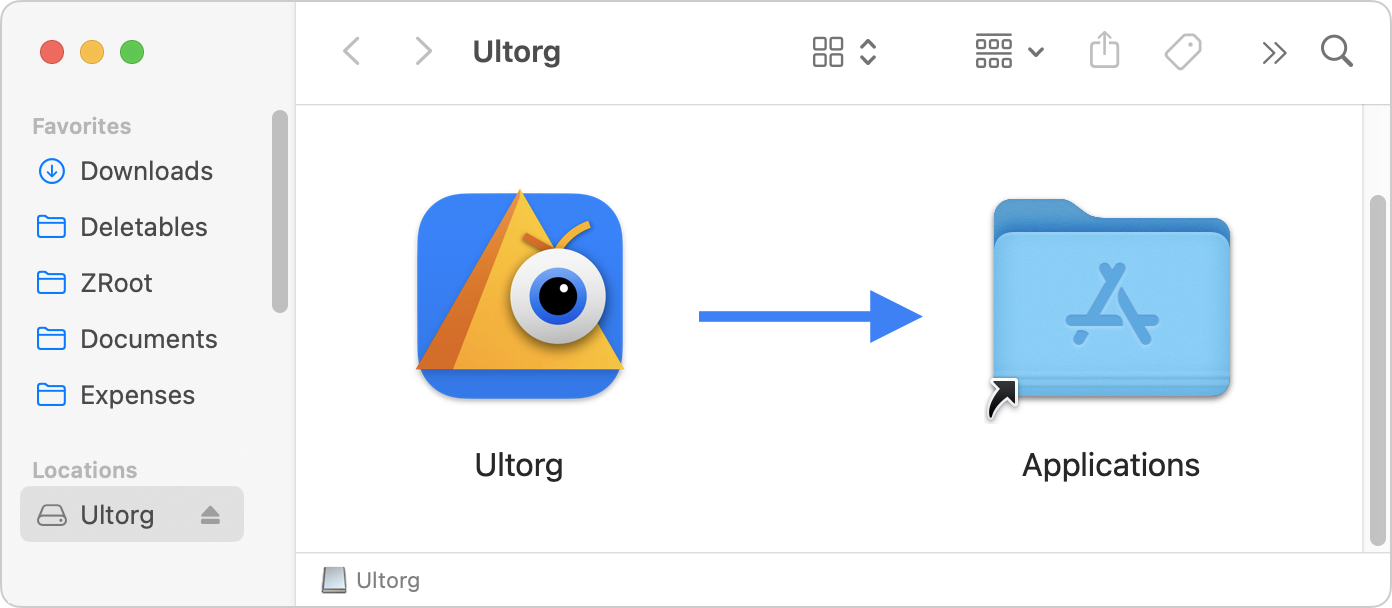
- Drag the Ultorg icon over to the Applications folder shortcut. If you have a previous version of Ultorg installed, you can answer Replace at the prompt.
- Ultorg can now be started from the Applications folder, in the same way as other MacOS apps. A security prompt will be shown the first time you run the app; click OK here.
Installation Instructions for Windows
- Download the Windows Installer (MSI) file above.
- If a previous version of Ultorg is running, close it. (No need to uninstall it, however.)
- Run the installer.
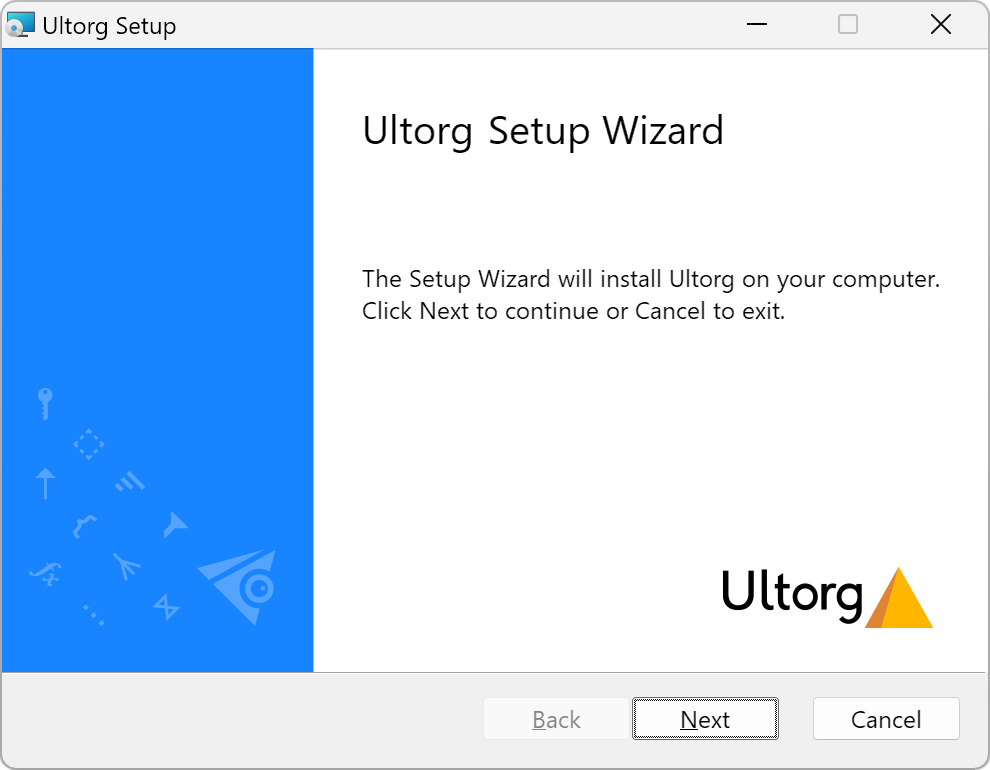
- Click Next in the installer steps, and Finish. Ultorg will be installed for the current user.
- You can now run Ultorg from the icon on the Desktop or the Start Menu.
(Alternatively, there is a ZIP file version of Ultorg that you can use e.g. to run Ultorg from a USB drive. For this method, extract the ZIP file to a folder of your choice, then run the file ultorg-2.1.4\bin\ultorg64.exe to start Ultorg. You may need to click past a security prompt.)
Installation Instructions for Windows (ZIP file version)
The ZIP file distribution of Ultorg can be used e.g. to run Ultorg from a USB drive. For other uses we recommend using the Windows Installer instead (select "Windows" in the dropdown above).
- Click the button above to download the ZIP file version of Ultorg.
- Unzip the downloaded file somewhere.
- Run the file ultorg\bin\ultorg64.exe. A security prompt may be shown the first time you run the app.
Installation Instructions for Linux
- Download the ZIP file above.
- Open a terminal, and run the following commands:
mkdir -p ~/Ultorg
cd ~/Ultorg
# Or substitute whatever path the ZIP file was downloaded to.
unzip ~/Downloads/ultorg-2.1.4-linux_x64.zip
ultorg-2.1.4/bin/ultorg
Some warning messages may appear ("deprecated method" etc.). These can be ignored if the app runs otherwise fine.
- To create a desktop icon for Ultorg on GNOME or KDE (including on Ubuntu), exit Ultorg and run the following command:
ultorg-2.1.4/create_desktop_shortcut.bash
This creates a desktop entry file called ultorg.desktop at the XDG data directory ~/.local/share/applications/, for the current user only. An Ultorg shortcut should now be available in your desktop environment.
If you previously had a shortcut to an earlier Ultorg version, it will be replaced.
3. After Installation
If the Activate Ultorg box appears, please follow the instructions to activate your trial period or paid Ultorg license.
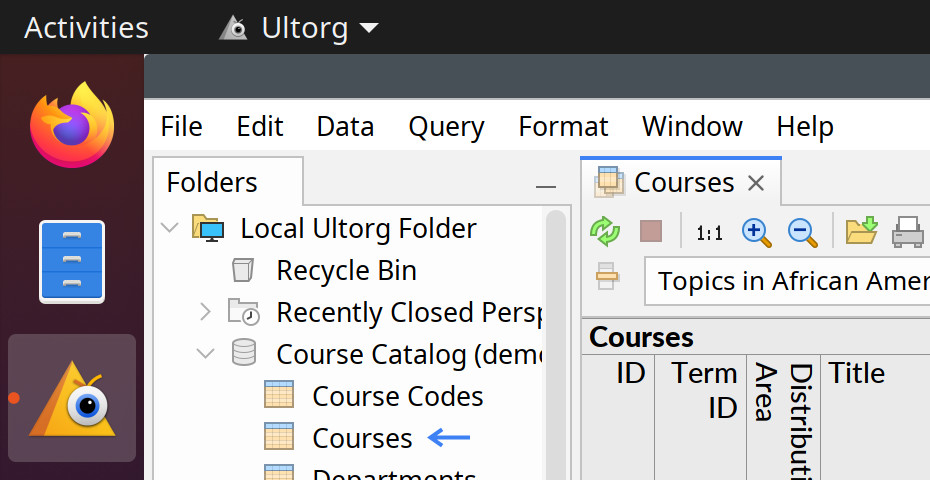
The Ultorg window should now be open with Local Ultorg Folder showing in the pane to the left. At this point, the application is ready to be used. To test Ultorg using a bundled example database:
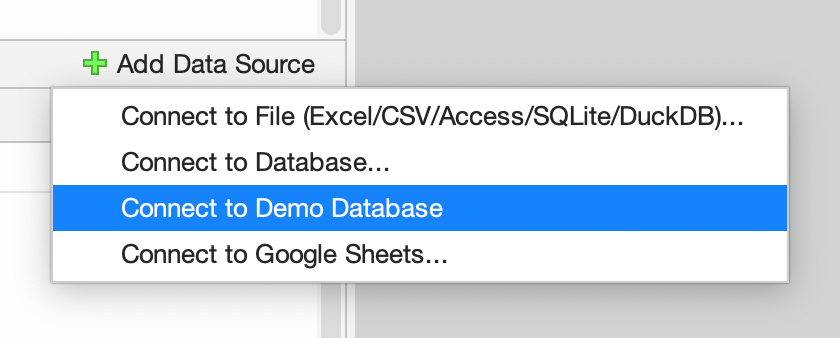
- Click Add Data Source in the panel to the left, and then Connect to Demo Database.
- A new icon appears for the data source, with data tables underneath.

- Double-click one of the tables in the data source (e.g. Courses in the demo database). This creates a new visual query, known as a perspective, starting from this table.
- You should now see some data in the center of the Ultorg window. From now on, all further query interactions are done from the central spreadsheet-like pane.
To see a menu of query-related actions, click the dropdown button (
 ) that appears when you hover over a column of data. Or, you can right-click any cell in a column.

The most used actions are Fields & Joins and Filter. You can access these by the keyboard shortcuts shown in the context menu. (On Mac, the Command key is used instead of Ctrl.)
To connect to other data sources, click Add Data Source and select an option. An Ultorg perspective can combine data from any number of tables in one or more data sources.
See the documentation site to continue learning about Ultorg.